

The Truth About Aspect Ratio
I felt a little click-baity writing the title for today's blog. The Truth About Aspect Ratio. Like there's some sort of dramatic reveal. The real truth about aspect ratio is that it's boring, and the "ratio" part can make non-math people turn their brains off (hi) at the start. But aspect ratio is a technical term for a pretty easy concept that will make printing your photos (even the ones on your phone) easier to understand.
Have you ever gone to print a photo, even a phone photo, and been confused or frustrated by the way it's cropped when you get it back? It might look like someone zoomed in and cut off someone's head, or a whole side of the photo might be missing. Or worse (in my opinion): there might be white bars on two sides of the photo, in order to keep the photo intact.
That's aspect ratio at work. The ratio of the photo you took might be in conflict with the size you're trying to print.
So, back in the film days of photography, you couldn't take a photo of just any size. We won't take you back all the way to the invention of photography and glass plates - let's just go back 20 years to when I was in college (ugh, time) and there were three main sizes of camera film. There was large format film (4x5"); medium format film (which came out square - hey, Instagram - or very slightly rectangular), and the very rectangular 35 millimeter (35mm).
The most common and mainstream was 35mm. You could buy it at the grocery store, pop it in your camera and then take it back to the grocery store to have it developed once you took all the photos (or use a disposable camera).

diagram from https://www.easybasicphotography.com/35mm-equivalent.html
The film literally measured 35 millimeters from sprocket hole to sprocket hole (hence the name) but the size of the photo was 24mm tall x 36mm across. Here comes the math: divide 24mm and 36mm by their largest common denominator (12), and you end up with 2mm x 3mm, or a 2:3 ratio. That means that when you printed photos, if you wanted the whole photo without cutting anything off, you needed to choose a paper that is also on a 2:3 ratio, like a 4x6" print (2x2=4; 2x3=6). If you wanted something bigger than 4x6", you could multiply up and get your bigger sizes, each without cutting anything off: 8x12; 16x24; 20x30; etc.
Now that we live in the digital age, aspect ratio is still important but it's slightly different. You can set your phone camera to your favorite aspect ratio and shoot in that ratio directly. Want all your photos to be square? Set your aspect ratio to 1:1 in your phone settings and then whatever you fit in the frame is your photo. Personally, I like the 16:9 aspect ratio for phone photos. Everyone knows they're phone photos and I like that they're a little wider on the sides and shorter from top to bottom when you hold the camera horizontally.

Even though we no longer shoot in 35mm film, we have mostly grown accustomed to the 2:3 aspect ratio for printing photos, and most digital cameras still shoot in that format. Let’s do an example. Here is a photo in its original 2:3 ratio:

And then here it is in various different crops. From left to right on top: 5x7; 8x10. These are the most popular crops for prints. Then from left to right on the bottom: 8.5x11 (like a sheet of paper); and 1x1.
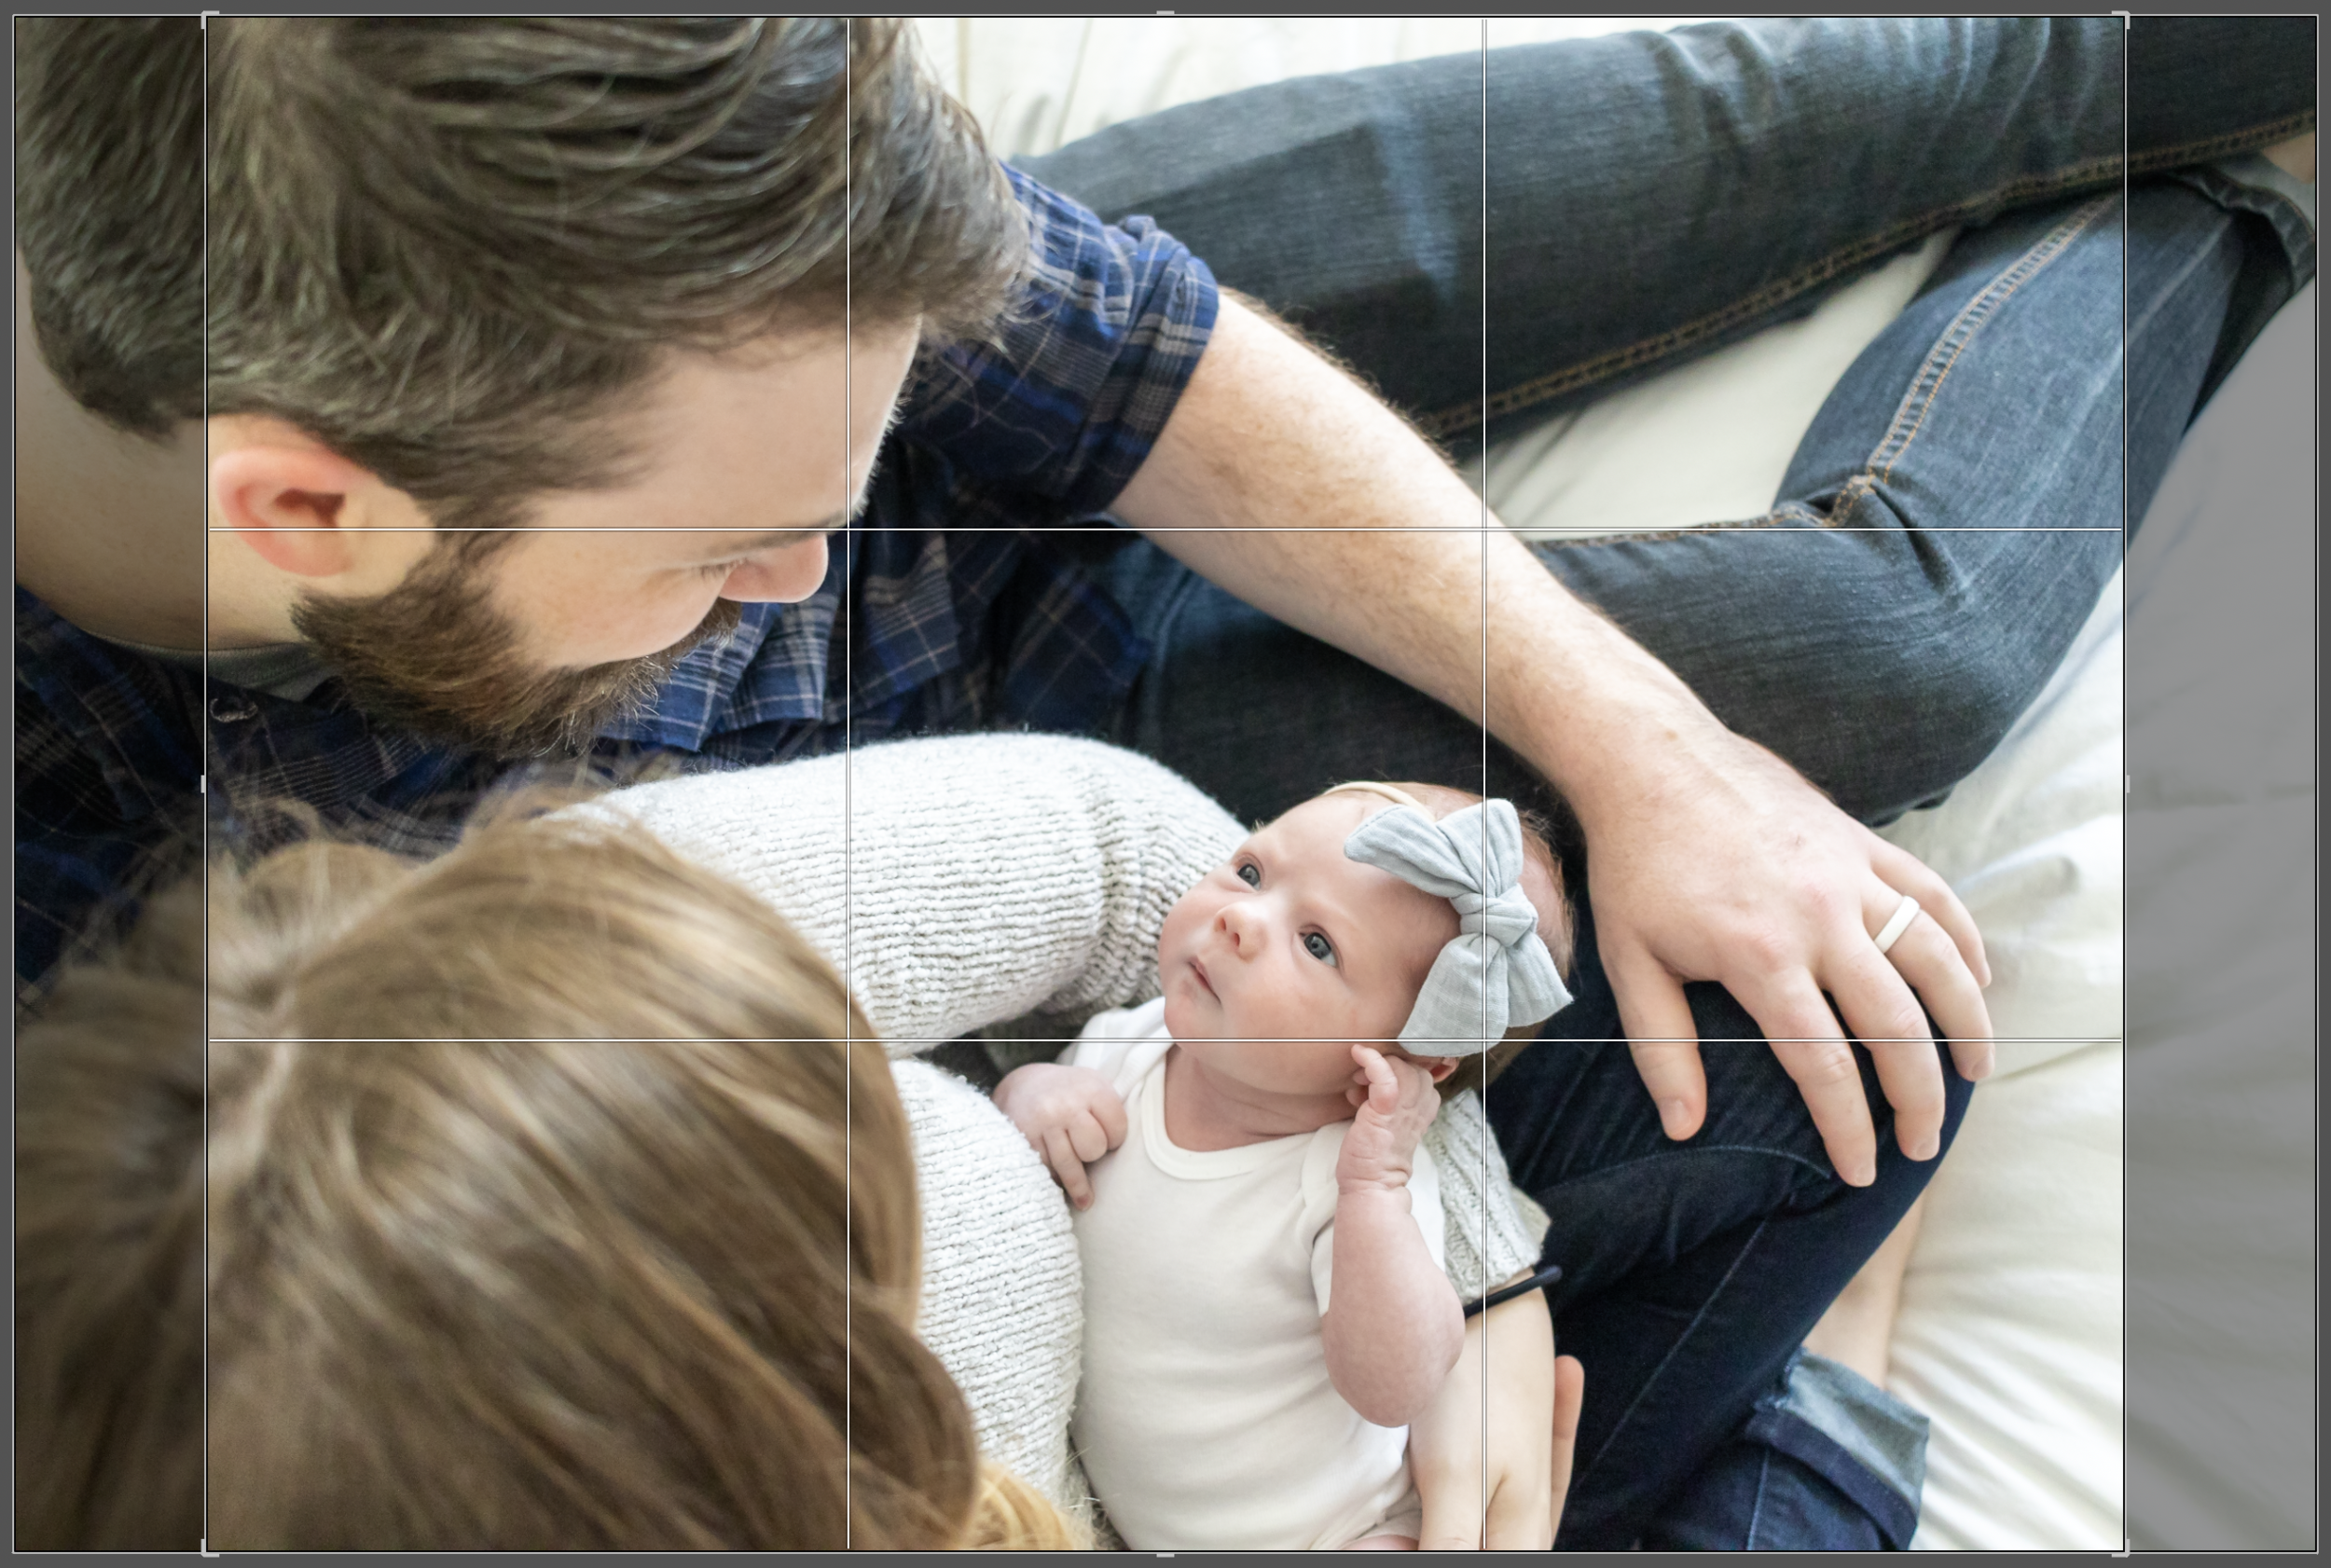
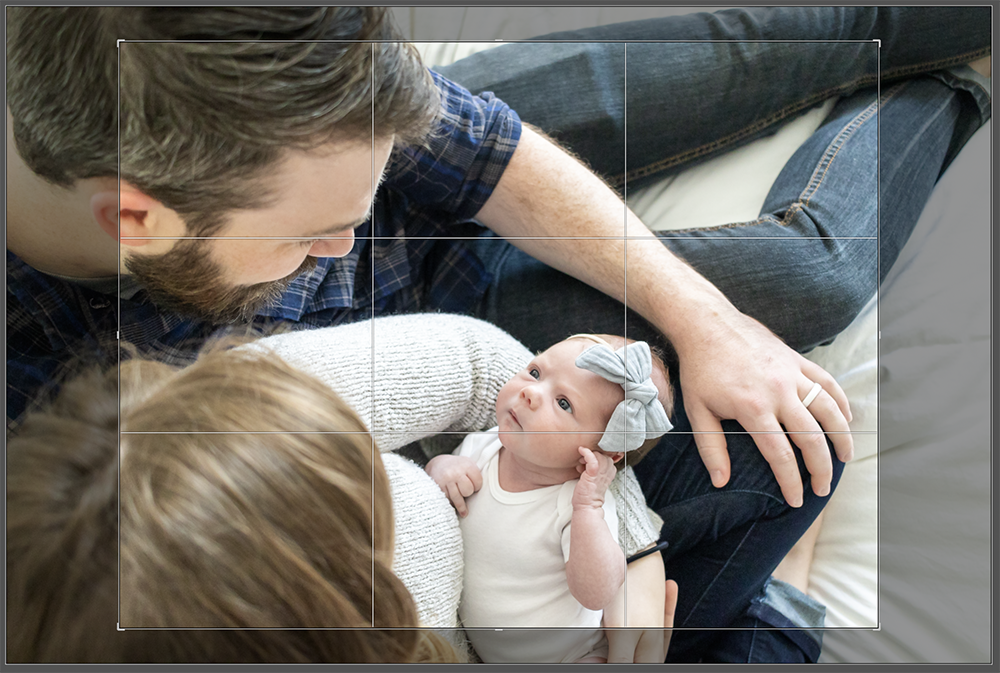
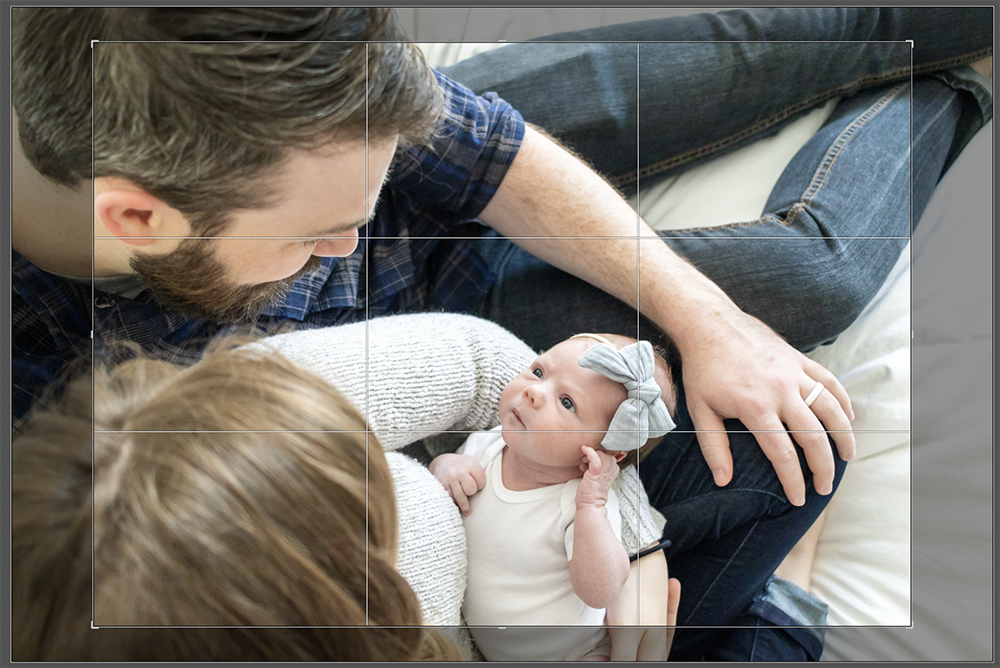
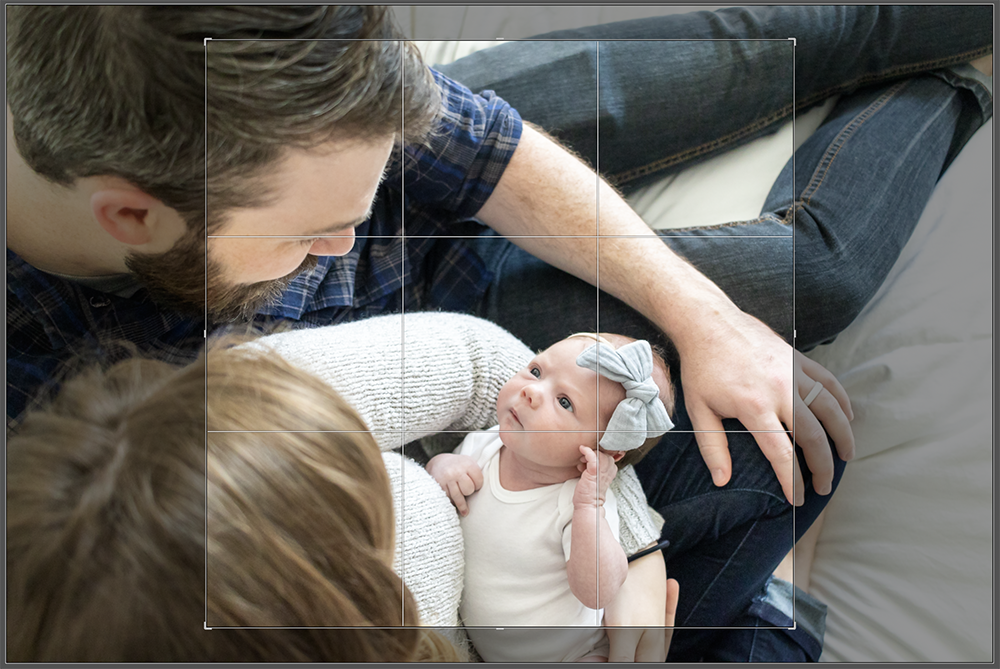
You can see that even in the 1:1 crop (bottom right) that you get the majority of the information in the frame and the photo still looks good. Aspect ratio and crop matters less when your subject is smaller in the frame. I like to fill my frame with my subject sometimes, and that can make off-ratio crops problematic. Look what happens when I fill the frame and then have to crop it for an 8x10:
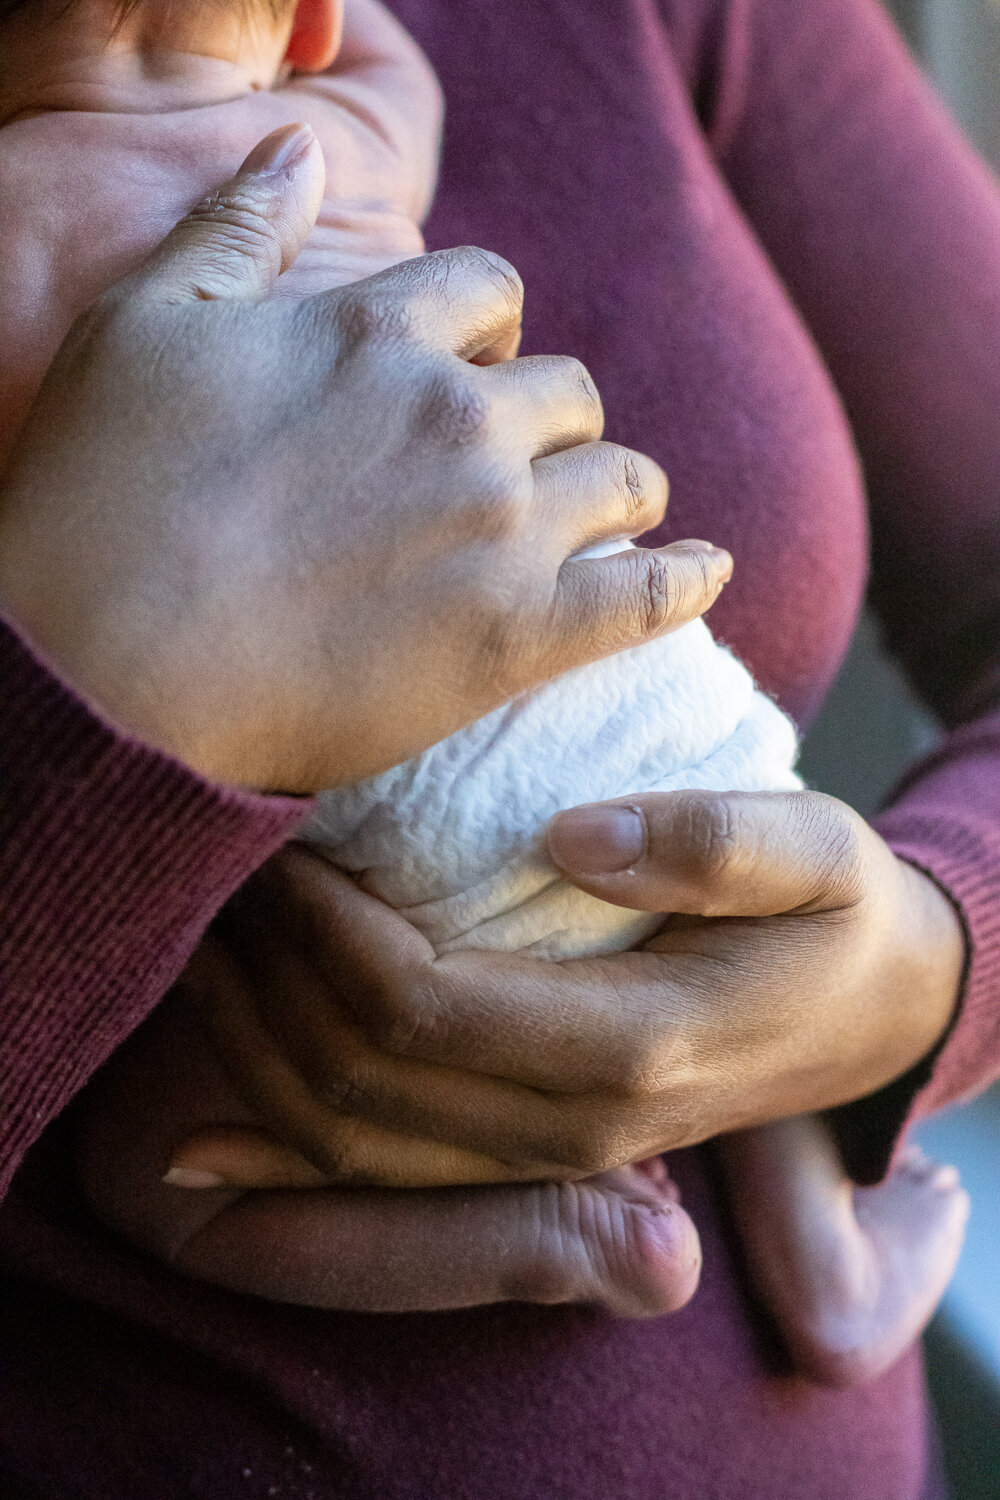
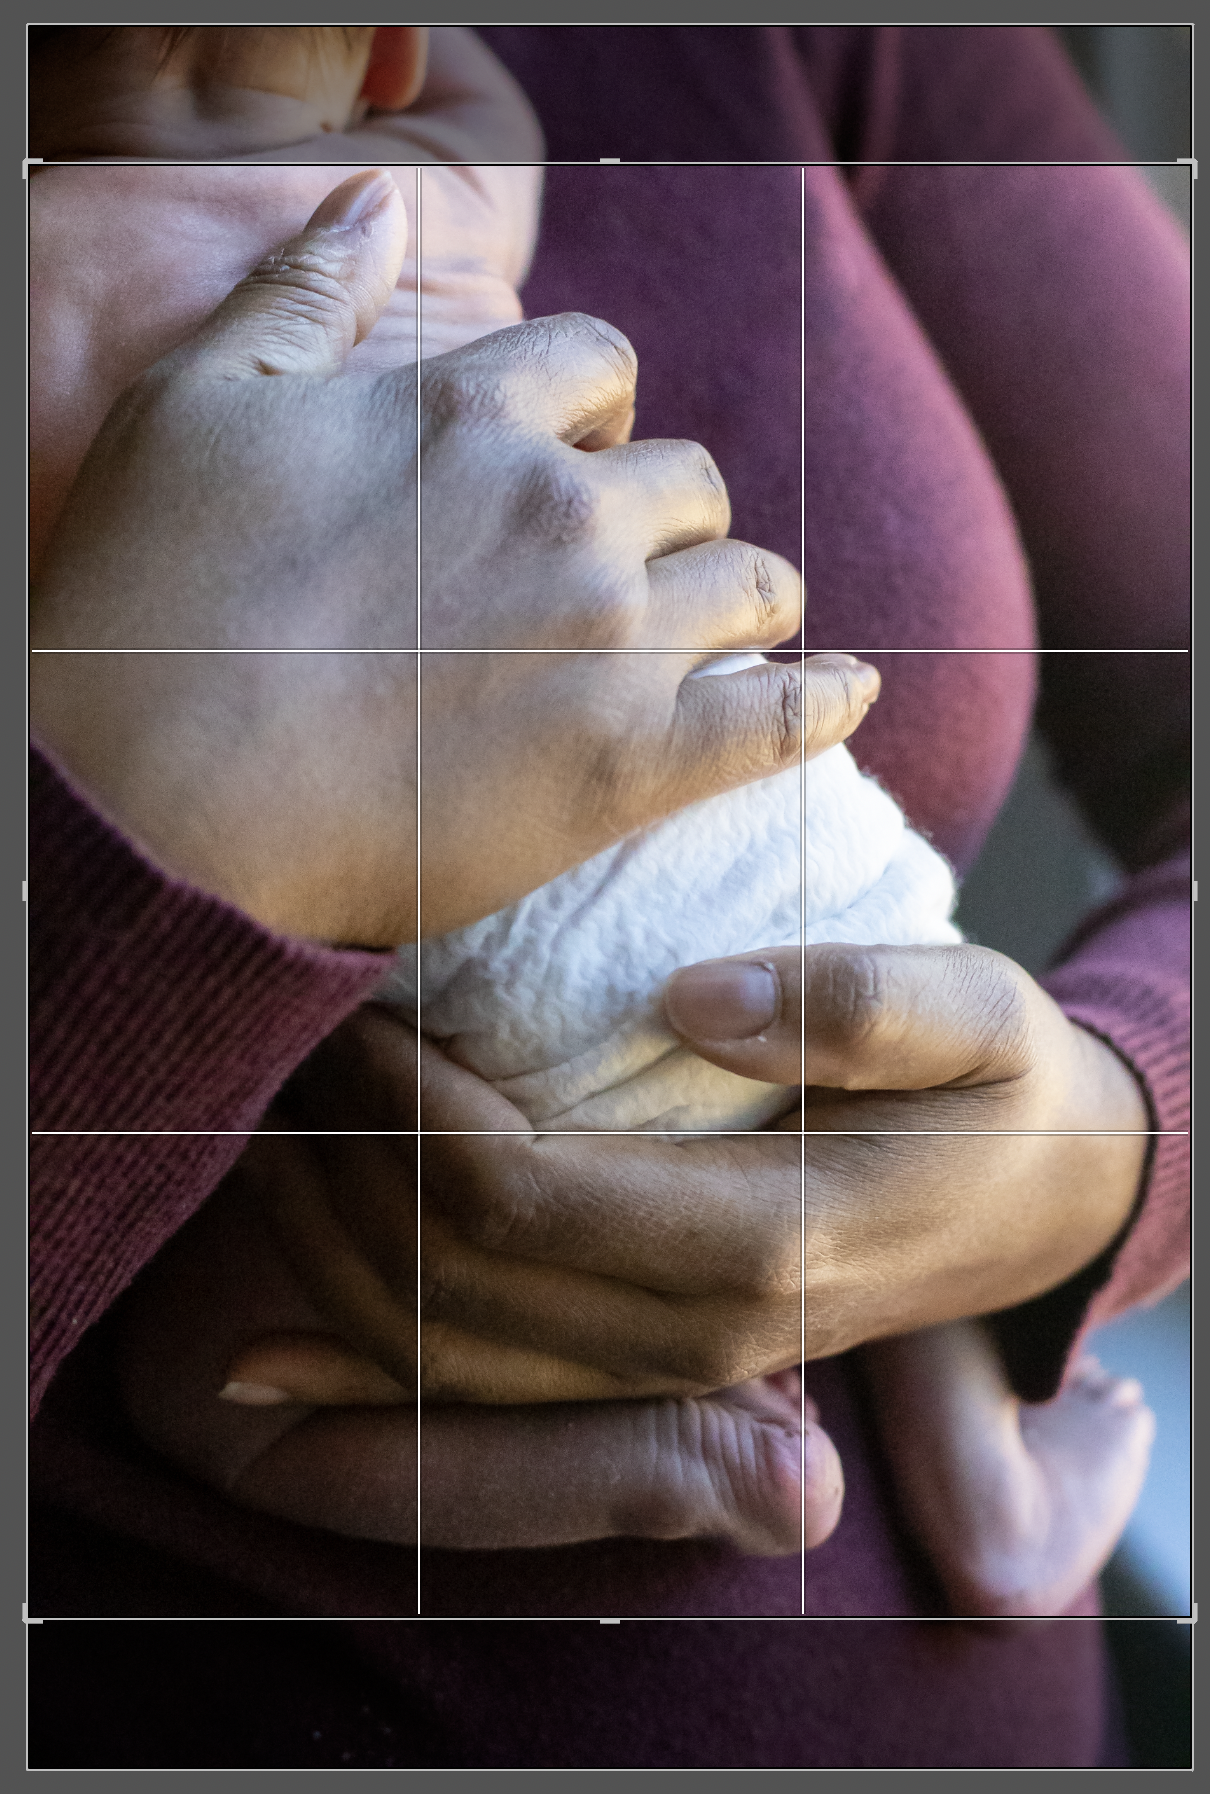
You'd lose either the baby feet at the bottom of the image, or as the photo on the right demonstrates, cut the photo off at the baby’s head, which is a total dealbreaker. This is where cropping gets tricky. If I wanted this image in an 8x10"ish size, I'd probably print it 8x12" size instead. 8x12” prints are slightly harder to frame because 8x12" frames are harder to find, but they're not impossible to find. (We also won't get into how I think this actually needs to be a 16x24" canvas hanging prominently in the hallway.) Also, a note about canvases and cropping - if you choose to wrap the image around the sides of the canvas, you're going to lose inches of your image to the wrap. I tend to choose black or white on the edges for that reason.
I hope this little intro to aspect ratio helps as you print your photos or choose sizes for prints in your gallery. In this case, size matters. And that's the truth.